Cabela’s Big Horn III Tent and Vestibule Instructions. Easy to follow instructions to set up the Big Horn III tent from Cabela’s. More pictures to come.
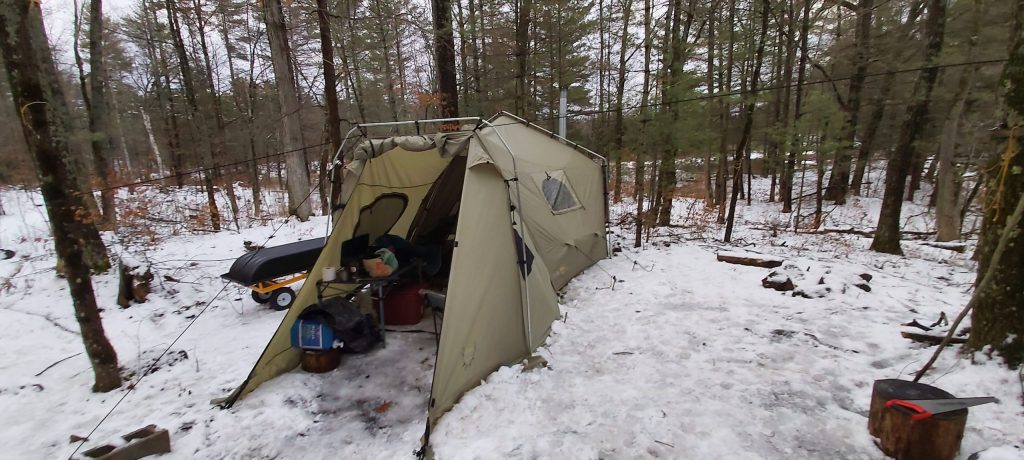
Winter camping is great – no bugs, no mud, no crowds. To have a successful winter camping trip however you need the proper gear. The most important piece of gear you will need is the tent. The Cabela’s Big Horn III Tent is a great winter tent with stove that will keep you protected from the elements.
Setting up Cabela’s Big Horn III Tent – Setup Instructions
Cabela’s Big Horn 3 is a great tent. It has many great features and some drawbacks we will be discussing in another post. The first time setting up the tent will be a challenge. The instructions are not very detailed and if you have not set up a similar tent in the past it will take some doing.
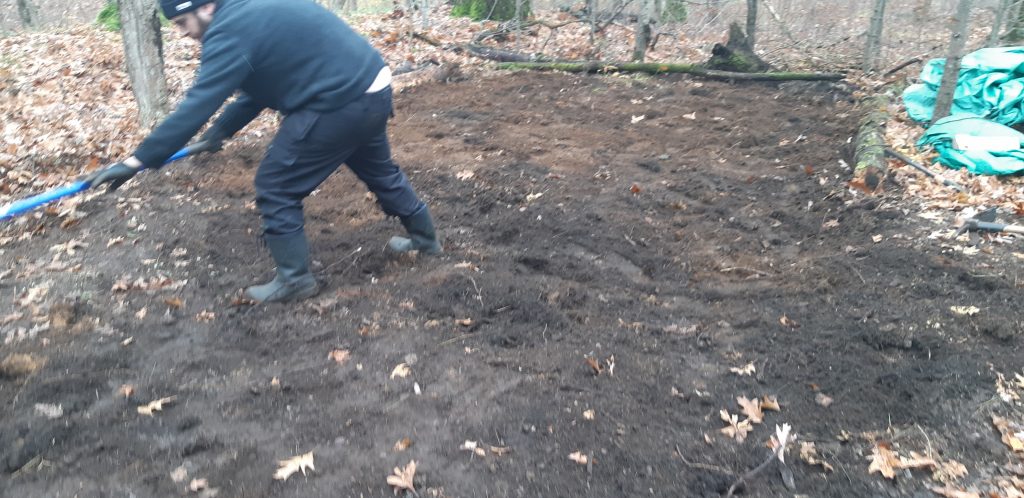
Preparing Your Tent Site
Before you start setting up the tent you want to clear an area roughly about 12 ft by 14 feet. That is the footprint of the Cabela’s tent so you might want to clear an area a little bigger so that you have enough space for the tie downs and to be able to walk around the tent freely. If you are setting up the vestibule you will need to extend the clearing by about 8 more feet from the front of tent. Once you have cleared and flattened an area to accommodate the tent you are ready to go with setting up the tent.
Setting Up the Tent
The tent comes with a bottom layer that is exact size if the floor of the tent. Lay this down first. Lay out the main tent over the bottom layer and match each corner. Both the tent floor and the bottom layer have zippers that open to keep the tent stove on the ground rather than the tent. Match the location of each zipper when lining the tent up with the bottom layer.
Each corner of the tent is marked by a blue strap. That is where you will stake it. There are 6 main straps to stake the tent.
Don’t stake it yet. The tent is quite heavy on its own so the risk of it moving around while setting it up is minimal. Staking it now will make clipping the tent to the poles a little more difficult. Find the door, which is only on one side, and make sure you place it where you want it. Obviously, the vestibule is going to be attached on the side with the door.
Attaching the Tent Poles
There are 3 main poles to the tent. 2 a-frame poles that go on each sides and a ridgeline pole in the middle.
The easiest way to set up the tent is to put together and connect the a-frame pole that is away from the door first. Fit each tube in the next and put together the a-frame pole. The tent comes with several ropes and guidelines. There are two white rope guidelines and these white ones are for the a-frame. Tie one of these on the peak of the a-frame pole and set it back on the ground. This will help you lift the a-frame and stabilize it while you work on the rest of the tent later.
Once the a-frame guideline is tied, insert the peak of the a-frame inside the fold in the fabric of the tent and clip each black clips on the one pole. Start with the two top clips and then try to get fit the metal spikes attached to the blue strap at the bottom of the tent. This will take some pulling so it is easier to do if you have not staked the tent yet. Once you get the peak clipped and each leg of the a-frame connected to the small spike on bottom you can start lifting the white guideline you connected earlier up. This will bring up one side of the tent. Tie it to a tree or a stake to stabilize the first half of the tent.
Now you can start connecting the middle ridgeline pole to the clips in the middle of the tent. Start only with the top 2 clips. Once those are connected connect the two on each side of the tent. You can connect the ridgeline poles to each other and stand them up to start giving your tent shape. Before you completely lift up the tent you will want to connect the roof panel protector. This goes around your chimney area to protect your tent from sparks and embers coming out of the chimney of your tent stove.
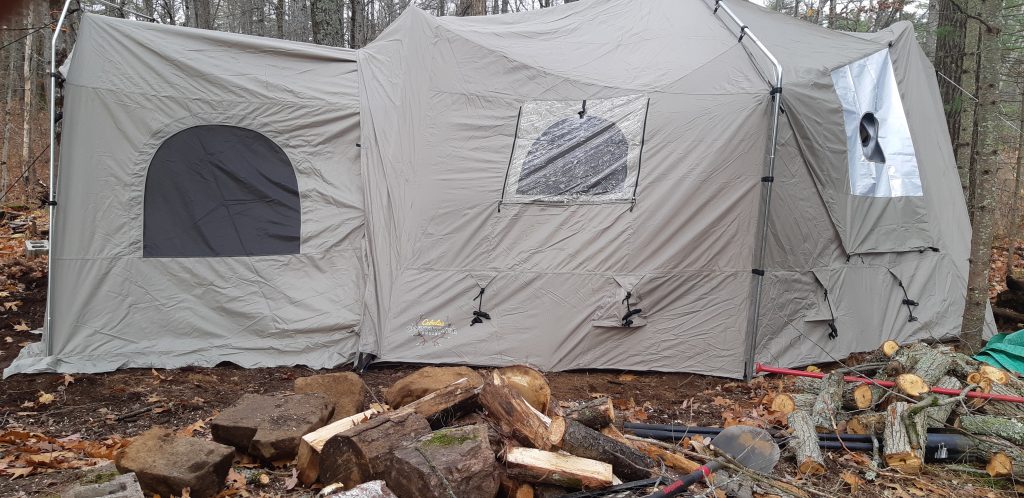
Cabela’s Big Horn III Tent – Roof Panel Protector
The roof panel protector is an odd shape. But it has clips on each end that connect with the main body of the tent. Start connecting the clips before you lift the tent. Once you lift the tent up it will be too high to connect. Once the fire protector is connected you are ready to move on to the next and final a-frame.
Like before insert the a-frame in the fold and clip the two top clips first. Insert the spikes at the bottom of each pole then start connecting the rest of the clips.
Lifting The Tent
Now everything is connected and ready to be lifted. Attached the other white rope guideline and begin lifting the front of the tent where the door is. Use a stake to secure it or tie it on a tree. Continue with attaching the clips on the ridgeline pole and connect the spikes on the tiedowns at the bottom.
Go around the tent, spike it if you haven’t already and spread out the tiedowns on each side. At this point and if you do not have the Cabela’s Big Horn III Tent Vestibule you are done. If you do have the vestibule (highly recommended) you can go ahead and continue reading the instructions for setting up the vestibule.
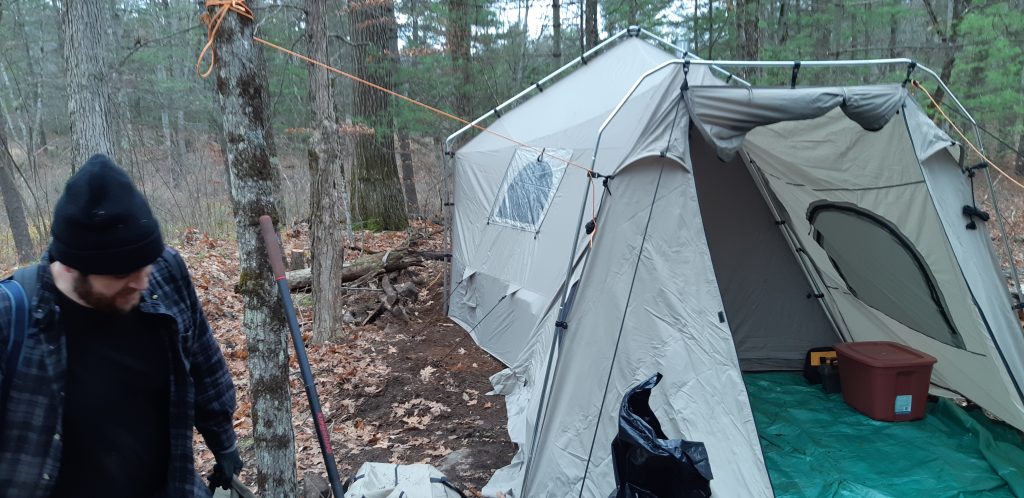
Setting up Cabela’s Big Horn III Tent Vestibule – Setup Instructions
You will be working on the front end of the tent with the door. Go ahead and toss the vestibule over the white rope you are using to support the tent. Keep it attached for now as it will help with stabilizing the tent. You can remove it later.
Attach the larger black clips of the vestibule to the a-frame pole of the main tent. Start from the top ones by attaching them on top of the a-frame and continue attaching the side ones. The Setting up Cabela’s Big Horn III Tent Vestibule comes with its own ridgepole. It is thinner than the one of the main tent. Set the ridgepole up and connect it to the smaller clips. Connecting the vestibule ridgepole is easier and will only take a couple of minutes. Lift the pole and set it up by connecting it to the small metal spikes on each side and at the bottom.
Stake out the corners of the vestibule so that you can unzip the door. Make sure the vestibule is balanced out so that each side is touching the ground. You can use the black tie downs of the front of the vestibule to secure the whole structure from the front.
At this point, and if you haven’t already, you can go ahead and remove the white tie down of the main tent. Go around the vestibule and the main tent tighten everything up and put in any remaining stakes. You are now ready to start bringing in your stove and gear!
Gear Used
Setting up Cabela’s Big Horn III Tent
Setting up Cabela’s Big Horn III Tent Vestibule
Hammer or mallet